I went to Edinburgh with the Wonder Thing - I went for a holiday, he went to avoid work :)
However, my camera broke before I went [I call it the Broken Blower] so I got no pictures whatsoever of what my hair and I did.
I decided that a 90's style rap would be the best way to detail what I did, at least, hair-wise.
To be sung to the chorus of 7 Days, a la Craig David.*
Did a Wash and Go on Sunday**
Put it in two puffs on Monday
I was in a bun by Tuesday
And on Wednesday and Thursday and Friday
Co-washed on Saturday.
* Even as I kid, I thought the lyrics and concept to the original song were highly suspect and just ick in general. Hairstyle optional.
** I can't really advise wearing a Wash and Go on the train if you are prone to falling asleep everywhere. You wake up with misshapen hair and a clear indication of which side you prefer sleeping on.
Monday, 25 June 2012
Monday, 18 June 2012
Best Laid Plans of A Simple Thing
I had a plan! That for one week, all the hairs on my head would be in a sock bun...

But it was only supposed to be for a week.
Knowing that I was going to be really busy for the next few months I decided to lay out a plan, of sorts, about what I was going to do with my hair during this quite hectic time.
My initial plan was this:
Week 1 - Sock Bun
Weeks 2, 3, 4, 5 - Smallish Twists
Week 6 - Twistout (kinda - my twistouts are, at best, strange looking. At worst, plain offensive)
Weeks 7 and 8 - Chunky Twists
Ideally, my twists were supposed to be small, dinky and flattering, but hard wearing enough to last for four weeks. Easy, no?
I'll be lucky if I can get away with two weeks.
Now, it's looking more like this:
Week 1 and 2 - The Untouchable bun
Week 3 and 4 - The Half-baked Hairstyle/Chunky Twists
Week 5 and 6 - Fitness that couldn't be witnessed.
Week 7 - Daydreaming hair [finally!] and a twistout
Week 8 - A highly anti-climatic bun.
At least it's all protective....and I'm certainly keeping it interesting.

But it was only supposed to be for a week.
Knowing that I was going to be really busy for the next few months I decided to lay out a plan, of sorts, about what I was going to do with my hair during this quite hectic time.
My initial plan was this:
Week 1 - Sock Bun
Weeks 2, 3, 4, 5 - Smallish Twists
Week 6 - Twistout (kinda - my twistouts are, at best, strange looking. At worst, plain offensive)
Weeks 7 and 8 - Chunky Twists
Ideally, my twists were supposed to be small, dinky and flattering, but hard wearing enough to last for four weeks. Easy, no?
Now, it's looking more like this:
Week 1 and 2 - The Untouchable bun
Week 3 and 4 - The Half-baked Hairstyle/Chunky Twists
Week 5 and 6 - Fitness that couldn't be witnessed.
Week 7 - Daydreaming hair [finally!] and a twistout
Week 8 - A highly anti-climatic bun.
At least it's all protective....and I'm certainly keeping it interesting.
Friday, 15 June 2012
Awkward
When I was walking home from church, someone beeped at me in a car and waved.
Although I couldn't see them, I waved back but then changed it halfway, just in case.

You know, like I have swag or something.
Fortunately, Wonder Thing later informed me that yes, I did know them, so it was okay.
Later on, we were walking into town when this girl on the bus started waving at us.
Instinctively, we both picked up our hands and waved in a jolly manner.
The girl looked mortified for us.
We looked behind us to see her friends looking at us in total and utter confusion.
Forget Donatello and his Teenage Mutant Ninja lot.
It was Awkward Turtle Time.

Tuesday, 12 June 2012
Bye Bye Bobby Pins!

I decided that the facade was no longer as shiny as it once was and that it was time to get rid of them once and for all...

Monday, 11 June 2012
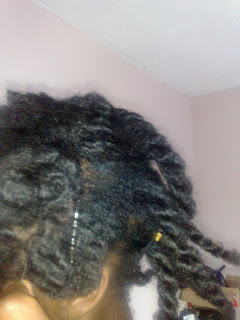
Twistout Experiments
My house sisters had been watching 'My Best Friend's Wedding' staring Julia Roberts.
But this was Julia Roberts before the brunette dye and the hair straighteners.
This was a Julia Roberts that proudly rocked her Celtic/European roots on her head with massive, wild and beautiful abandon.
She was Merida before Merida.

Despite the fact I could barely bring myself to watch her exploits in that film (attempted man snatching is tacky, no matter how charming and honest you try and be about it), the thought of her hair stuck in my head and pushed me into trying out a twistout.
I don't usually try twistouts because my roots look amazing, despite the fact that nobody can see them as high as they are on the top of my graceful Amazonian head; On the other hand, my ends are a straggly, stringy mess, despite the fact it's darn near impossible to hide them.
Me no likey.
What's a girl to do? Apart from rock twists and textured buns?
Why, practise of course!
I decided to be all methodical about it and try it dry, damp and wet with the same products, write down my results. Analyse the results and see how I can modify them to get what I was looking for.
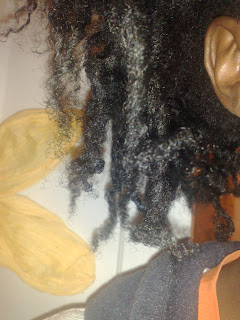
First up: A kind ofdry twistout, done with the usual suspects: Spritzed with water, applied Giovanni direct leave in and some shea butter and coconut oil.

It was set in 10 flat twists, five on each side.

Then pinned.... into a type of labyrinth. 45 minutes to do altogether.


For the take down, I rubbed Castor oil, Coconut oil, 2 drops of Neroli essential oil and 4 drops of peppermint essential oil (for the smell) on my hands and dabbed that on my hair all over, then started unravelling. Took about 7 minutes to take it down.
The left side come out BRILLIANT. I LOVED it - amazing fullness and definition. The ends were still scraggly, but less noticeable than normal.
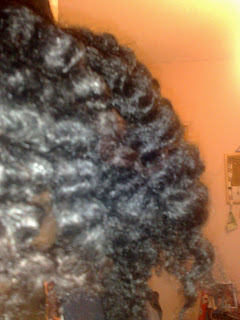


The right side - eh >.< I must have stretched it a bit too much because a lot of the definition was lost. Rubbish. But I have my method! My (semi) perfect method that means that doing it on damp or wet hair is now a moot point.
In other news - What in Anne's Green Gables is going on with the shape of my hair!? I pinned the fail of a twistout over to the left, which accentuated how lame it is.

The cut of my hair is getting drastically worse instead of better. The top layer of my hair thinks it is the top bit of a mullet and the bottom layer thinks it is taking part in some inverted bob experiment and yet I constantly pin it as though it has a side shaved off. Just who do those three chunks of hair think they are? The round, clean well maintained cut I constantly envision in my head is such an illusion. This is what happens when you grab a random chunk of hair in front and call it a fringe - things get confused.

I need to get it cut.
But this was Julia Roberts before the brunette dye and the hair straighteners.
This was a Julia Roberts that proudly rocked her Celtic/European roots on her head with massive, wild and beautiful abandon.
She was Merida before Merida.

Despite the fact I could barely bring myself to watch her exploits in that film (attempted man snatching is tacky, no matter how charming and honest you try and be about it), the thought of her hair stuck in my head and pushed me into trying out a twistout.
I don't usually try twistouts because my roots look amazing, despite the fact that nobody can see them as high as they are on the top of my graceful Amazonian head; On the other hand, my ends are a straggly, stringy mess, despite the fact it's darn near impossible to hide them.
Me no likey.
What's a girl to do? Apart from rock twists and textured buns?
Why, practise of course!
I decided to be all methodical about it and try it dry, damp and wet with the same products, write down my results. Analyse the results and see how I can modify them to get what I was looking for.
First up: A kind ofdry twistout, done with the usual suspects: Spritzed with water, applied Giovanni direct leave in and some shea butter and coconut oil.

It was set in 10 flat twists, five on each side.

Then pinned.... into a type of labyrinth. 45 minutes to do altogether.


For the take down, I rubbed Castor oil, Coconut oil, 2 drops of Neroli essential oil and 4 drops of peppermint essential oil (for the smell) on my hands and dabbed that on my hair all over, then started unravelling. Took about 7 minutes to take it down.
The left side come out BRILLIANT. I LOVED it - amazing fullness and definition. The ends were still scraggly, but less noticeable than normal.


The right side - eh >.< I must have stretched it a bit too much because a lot of the definition was lost. Rubbish. But I have my method! My (semi) perfect method that means that doing it on damp or wet hair is now a moot point.


I need to get it cut.
Friday, 8 June 2012
If you bake, you're a baker...
I lost my purse and was looking for it (as well as for some spare sympathy).
Well, at least I know now who not to turn to when I want a crumb of compassion...
Me: *whining* Why can't I find iiiiiit? First I lost my debit card and now I've lost my entire purse! Why do I keep losing stuff?
House sister: Well, some people bake and are bakers. And some people lose things and are...
*Slowly realising where this conversation if going, I give her a stony glare*
House sister: *grins* Losers!
Well, at least I know now who not to turn to when I want a crumb of compassion...
Wednesday, 6 June 2012
Big Buttermilk Scones

It's like our 4th of July except, you know, we're not celebrating freedom from monachy, we're....er....doing the opposite and celebrating the monarchy.

Moving on swiftly! I decided to get into the mood of things and bake scones because they are delicious when served with butter and jam [traditionally, it's clotted cream, not butter, but that's not happening in my household].
I got the original recipe from the Good Food website - it's only minorly modified because I had some buttermilk left over from making Red Velvet Cupcakes for my colleagues and decided to use it here.
The result were really soft, light scones that kind of melted away in your mouth. They were incredibly moreish and sharing them was one of the most selfless things I've ever done in my life. Deeee-lightful!
The best thing is that it's so simple and easy to do you can leave the room for less than half an hour, and then return with hot scones.
It's an instant recipe for popularity!
Big Buttermilk Scones
[adapted from a Good Food recipe]
Makes 6 pretty big scones Preparation time: 10 minutes Baking time: 10 - 15 minutes
Ingredients:
350g self-raising flour [I ran out half way and had to use plain so my scones didn't rise as much] + extra for dusting
1 tsp baking powder
1/4 teaspoon of salt
60g butter, cut into cubes
3 tablespoons sugar
180ml buttermilk
1 egg, beaten, to glaze
Method:
Preheat the oven to 220C/fan 200C/gas 7.
Sift the flour, salt and baking powder together into a bowl.

Add the cubed butter...

And then gently rub it into the flour mix with your fingers [or in a food processor]...

...Until the mix resembles rough breadcrumbs.

Add in the sugar and stir it in.
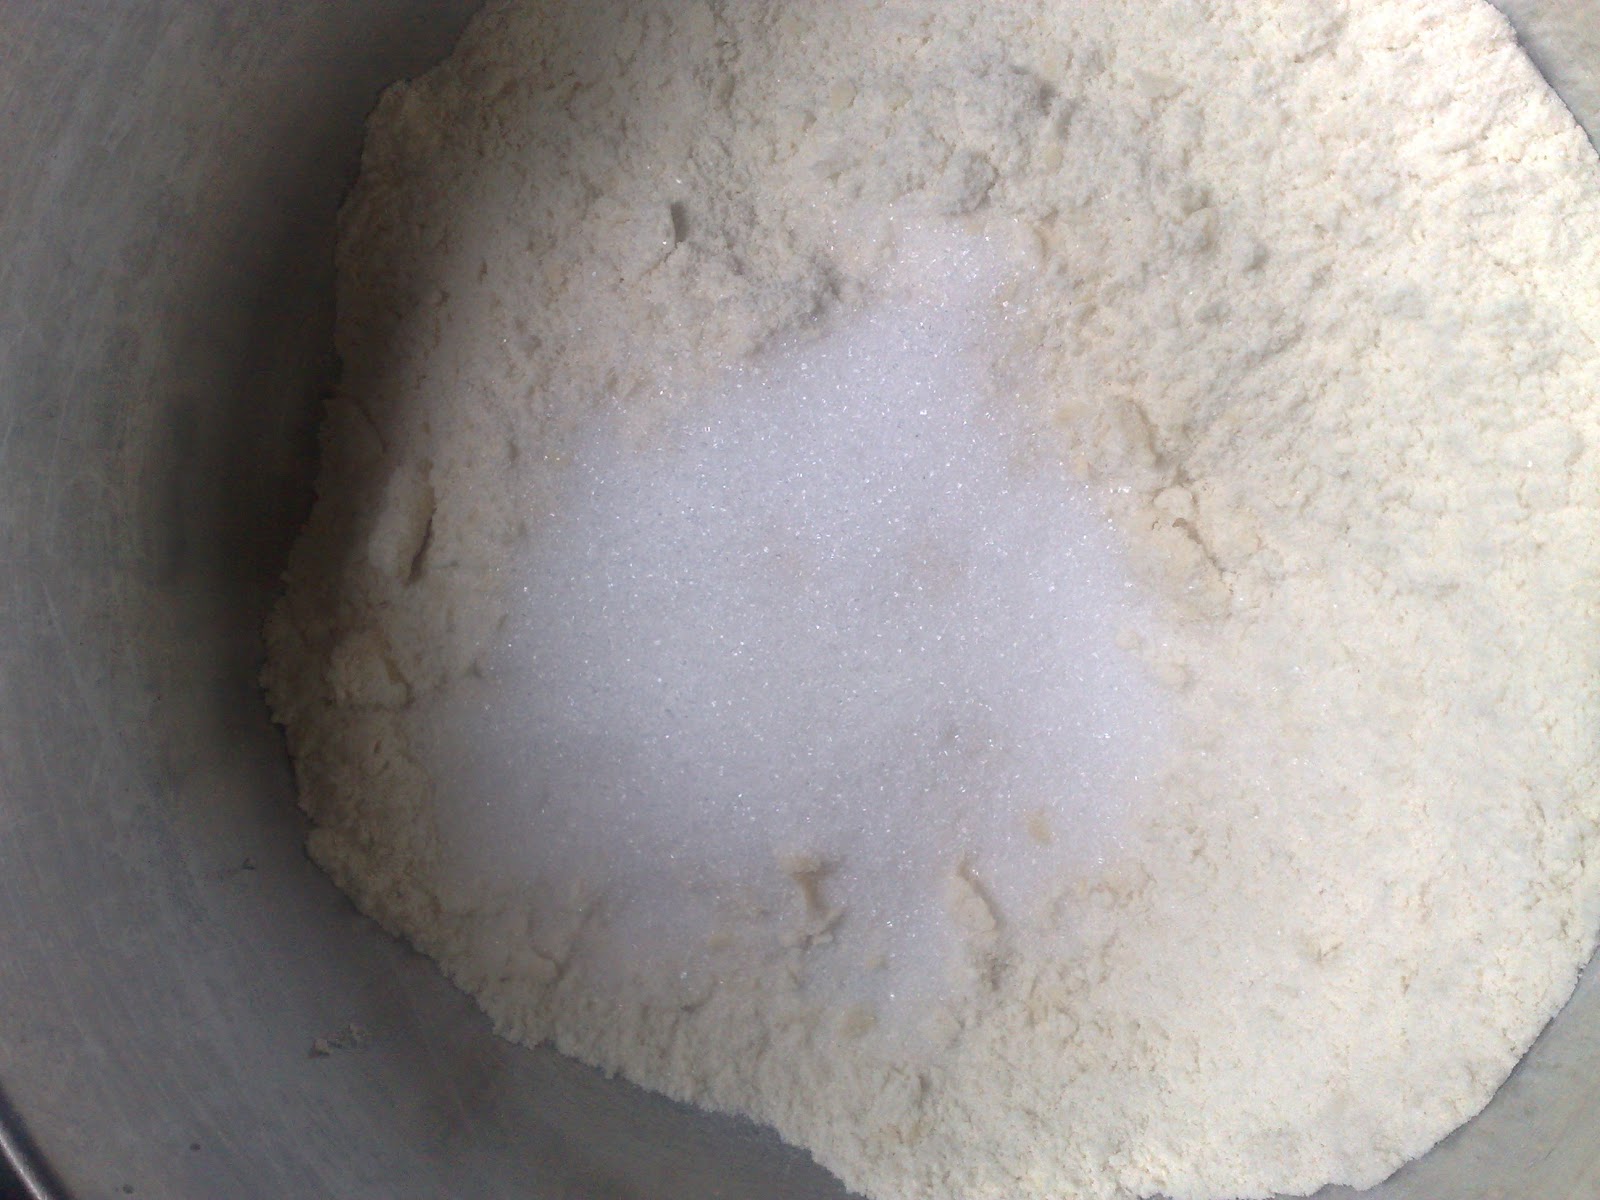
Then stir in the buttermilk, and vanilla extract.

Generously flour a clean, cleared surface

And dump the dough thing you created onto the surface. Now, remember, you are not kneading the dough [who wants bread-like scones? Ewwwwww!]. Nope, you're just trying to make the surface a little bit smoother and shape it so you can cut scone shapes out of it. So from this...

To something better than this =D

Now, if you use a 5cm pastry cutter, you will end up with about 8 scones. If you use a mug that is about 5 inches, you will only end up with 6 scones. Reading instructions is important.

Before you start stamping out your scone shapes, shuffle the mouth of whatever cutter you're using in the flour to prevent sticking.
Then start stamping out the shapes.

If there's any dough left over, just gently remould it and start stamping again.
Place them on the baking sheet. It doesn't matter how close they are together, since they don't spread outwards. They just go upward a lot little bit.


Pop them in the oven for about 10 - 15 minutes [the bigger the scones, the longer they'll take to bake]. You may need to leave the room. The tension will be unbearable as the scent starts to permeate through your baking and you'll be tempted to open the oven door numerous times.
But eventually they will be done.


Scones are traditionally served stuffed with clotted cream and jam. I prefer them with a slick of butter and jam.
I would totally have a picture but I was too busy eating them that I forgot....
Monday, 4 June 2012
Daydreamin' in my hair
The first time I'd ever heard Jill Scott or Lupe Fiasco was when they collaborated on this song:
I remember, my first thought being: "Wow, her hair is amazing!"


My initial attempts at recreating this look were....unsuccessful and frustrating.
Suddenly, I stumbled upon this post. I had to rub my eyes, because the similarity was astounding. Here I was, trying my hardest and Nik had just gone out and done what I'd been doing my darnest to do for over a year!
The other day, while at work, I got the song stuck in my head. Sitting there, clumsily tried to mentally recreate Lupe's flow, I remembered Jill's hair.
And I decided heck, let me have a go at this myself!
However, at first look, there are a few snags:
1I don't know how to cornrow and
2) My fine hair may not do this amazing style justice.
I'd washed my hair on Saturday - it was the usual. Applied Vatika Oil the night before, went swimming, and then tried to scalp wash with Baking Soda (more on that later - eek!) . Rinse that out, then spritzed diluted apple cider vinegar onto my scalp and conditioned for a couple of minutes. Then that all got rinsed out too. Used my Giovanni Direct Leave in and Caster and coconut oil on top of that. I banded overnight and wore my hair in a sock bun all Sunday in order to keep it stretched out, ready for Monday.
I decided to sweep all over my hair over to one side first and then twist it in that direction. I didn't use any extra product apart from what I had on still from my Saturday wash. I actually liked it, so I put it in a bun, donned a headband and then left the house.
The next day, I undid them, and swept them all over to the side and trying to pin curl them.
This is the point where I wonder what the heck I'm doing.


I could definitely work to improve my technique, so they turnout more defined.
I think I need to roll themselves around more tightly and loosen it after they're pinned, instead of loosely pinning them...if that makes sense?
It's definitely a work in progress!
The funny thing is, I'm pretty sure I've done this kind of style (pin curls) before but I was never really happy enough with them to leave the house wearing it.
I remember, my first thought being: "Wow, her hair is amazing!"


My initial attempts at recreating this look were....unsuccessful and frustrating.
Suddenly, I stumbled upon this post. I had to rub my eyes, because the similarity was astounding. Here I was, trying my hardest and Nik had just gone out and done what I'd been doing my darnest to do for over a year!
The other day, while at work, I got the song stuck in my head. Sitting there, clumsily tried to mentally recreate Lupe's flow, I remembered Jill's hair.
And I decided heck, let me have a go at this myself!
1I don't know how to cornrow and
2) My fine hair may not do this amazing style justice.
I'd washed my hair on Saturday - it was the usual. Applied Vatika Oil the night before, went swimming, and then tried to scalp wash with Baking Soda (more on that later - eek!) . Rinse that out, then spritzed diluted apple cider vinegar onto my scalp and conditioned for a couple of minutes. Then that all got rinsed out too. Used my Giovanni Direct Leave in and Caster and coconut oil on top of that. I banded overnight and wore my hair in a sock bun all Sunday in order to keep it stretched out, ready for Monday.
I decided to sweep all over my hair over to one side first and then twist it in that direction. I didn't use any extra product apart from what I had on still from my Saturday wash. I actually liked it, so I put it in a bun, donned a headband and then left the house.
The next day, I undid them, and swept them all over to the side and trying to pin curl them.
This is the point where I wonder what the heck I'm doing.


Bobby Pins! More bobby pins! They will make everything better!

This is where I think I know what I'm doing.


This is where I think - "Hey...I think I kinda like this."


I could definitely work to improve my technique, so they turnout more defined.
I think I need to roll themselves around more tightly and loosen it after they're pinned, instead of loosely pinning them...if that makes sense?
It's definitely a work in progress!
The funny thing is, I'm pretty sure I've done this kind of style (pin curls) before but I was never really happy enough with them to leave the house wearing it.
 |
| April 2011 |
Or maybe it's because my last attempts were cack.
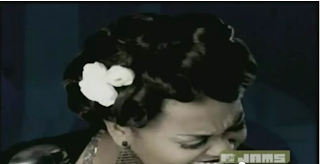
This time, I popped in a hair flower and faced the world with what I had on my head.
 |
Subscribe to:
Posts (Atom)